

Source: flickr.com via Karboojeh on Pinterest
When I was a teenager (a few years ago, hehehe), I grew up with a few Laura Ashley skirts and floral accessories, and up until this day I continue to associate pretty pastel florals to this wonderful brand. Florals are now witnessing a big come back thanks to the school of ‘vintage-chic,’ which is celebrating everything beautiful my generation has seen the last drops of. We’ve been through the ‘ugly’ eighties, but we’ve captured the last offerings of the glorious 70’s, and florals seem to have managed to make their way into our lives up until the early 90’s.
The above pic shows a few Laura Ashley floral fabrics. They go together so well, although the motifs are different.
Below is a vintage-style bedroom with a country, yet contemporary, twist. The chest of drawers is from Laura Ashley as well as the vintage-style floral patterned accessories.

Source: housetohome.co.uk via Karboojeh on Pinterest
For more Laura Ashley accessories, I picked this floral mug for you…

Source: lauraashley.com via Karboojeh on Pinterest
The vintage-chic style is probably the most among other trends that is celebrating florals in a big way. Vintage-chic stylists and bloggers are showing us ways to mix and match, and stack up on florals upon florals in one location, in one room, which is exactly what I am liking recently. Look at this…

Source: flickr.com via Karboojeh on Pinterest

Source: poppytalk.blogspot.com via Karboojeh on Pinterest

Source: poppytalk.blogspot.com via Karboojeh on Pinterest

Source: housetohome.co.uk via Karboojeh on Pinterest
Florals, which are a staple of the British aesthetic and the prairie trend, have also seen a come back into fashion lately. Belts and little floral details have appeared in this year’s spring/summer clothes and accessories.
Another brand name that celebrates full throttle florals is Cath Kidston, whose take on florals is a bit different than the classic Laura Ashley line, but all the same I love them both (I did mention this earlier in a previous post). Here is an example of Kidston’s accessories.

Source: gottohaveit.co.uk via Karboojeh on Pinterest
I also found florals from other brands, such as this mug, which ultimately reminds us of Laura Ashley’s style.

Source: gottohaveit.co.uk via Karboojeh on Pinterest
Finally, this is my biggest floral crush… vintage floral cards. Yum.

Source: georgiahousepublishing.com via Karboojeh on Pinterest
And this one here….

Source: umla.tumblr.com via Karboojeh on Pinterest
Ok, then, I’ll leave you with a flowery and sunny day, hopefully, and see you next time,
K


 ♥ ♥ ♥ ♥ ♥ ♥ ♥ ♥ ♥ ♥ ♥ ♥ ♥ The Crafts Dept.
 ♥ ♥ ♥ ♥ ♥ ♥ ♥ ♥ Fresh Home Ideas
 The Crafts pages of Martha Stewart
 ♥ ♥ ♥ ♥ ♥ ♥ Life.Style.Etc
 ♥ ♥ ♥ ♥ ♥ Whole Lotta Lovley
 http://houseoffiftyblog.blogspot.com/
 http://isabellaandmaxrooms.blogspot.com/
 http://theshopatnumber57.com/
 http://www.housetohome.co.uk/livingetc
 Anthology: Living with Substance & Style
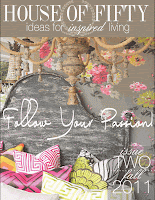 House of Fifty: Ideas for inspired living


