Handmade amethyst earrings with silver wire

8 Dec

Karboojeh Handmade Amathyst Earrings with Silver karboojeh-handmade-amathyst-earrings-with-silver-full

Hello all… it’s been a long time since I posted anything on this blog. It’s been a busy month, really! So I am here today to share a few handmade jewelry items I made a while back with silver wire and gemstones.

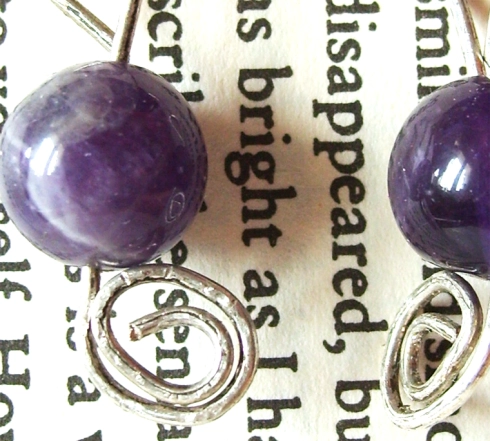
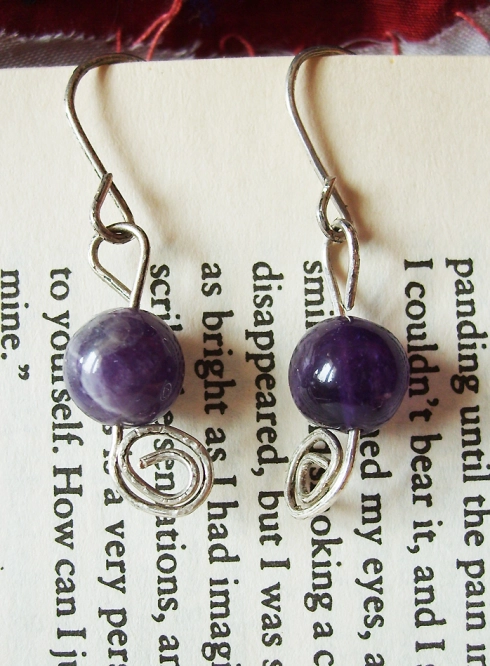
This amethyst earring pair is one of my favorites.

karboojeh-handmade-amathyst-earrings-with-silver-full

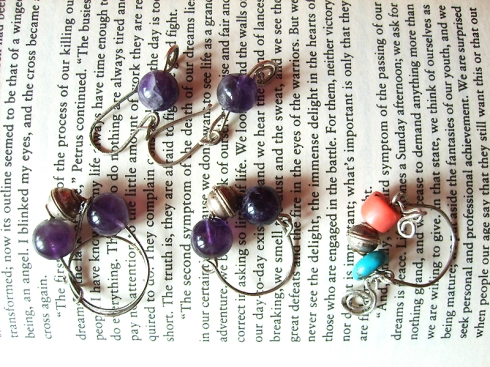
I made this earring as part of a silver wire collection, here’s a group photo:

karboojeh handmade silver gemstone antique silver jewelryI love amethyst, its purple/lavender color is surprisingly a neutral that goes with so many other color combinations.

There is something quite majestic about amethyst; you feel it’s very much suited to sit on Royal Crowns, due to the way it reflects wisdom, nobility, royalty, and leadership. The fact that amethyst shades are usually darkish and subtle, I feel people who love this gemstone are usually the wise, deep type. They’re not flashy, since amethyst is a mediator between earth and sky, with colors that can very much be found at dawn, or on the surface of the ocean – in a degree or two of amethyst.

I leave you with amethyst today; more gemstones to come in the future hopefully,

take care…

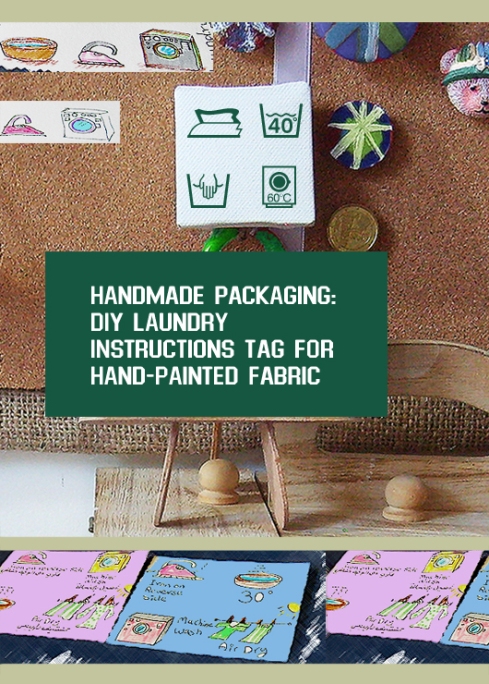
Handmade Packaging: DIY Laundry Instruction Tags for Hand-painted Textile Products

20 Oct

I have a little project to share with you, it basically brings together two of the things I love: Illustration and packaging. If you are making hand-painted fabric totes, scarves, tablecloths, etc, using fabric paints, then I hope you will like this idea.

A while back  I started painting on fabric, using permanent fabric paints and colors. If you have experience with fabric paint, then you must know that to fix the colors you mostly need to iron your finished product on”cotton setting” to make the artwork permanent. But there are products that only need to be air-dried for at least 72 hours before going to the washing machine on a gentle-cycle, and on a certain, usually low, temperature.

This slideshow requires JavaScript.

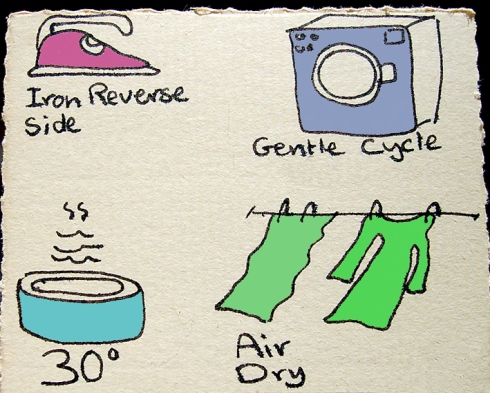
As I mixed brands and worked with more than one “instructions booklet,” I felt the need to merge the instructions from the different fabric-paint brands in a way to make all the products I worked with laundry-friendly. I decided to choose the instructions that recommended the lowest heat-setting, the lowest washing-machine temperature, and I decided maybe it was best if I recommended all pieces be ironed on reverse, since that was the safest method for some fabric-paint labels, and no tumble dry.

This is the basic illustration I came up with for most of my products. There are items though, that required to be washed by hand. This meant the washing-machine illustration had to go, and another symbol was sketched instead. I did play with this photo (above) a bit and added the colors with Photoshop, but one can achieve a clean colorful illustration by applying acrylic paint with a thin brush.

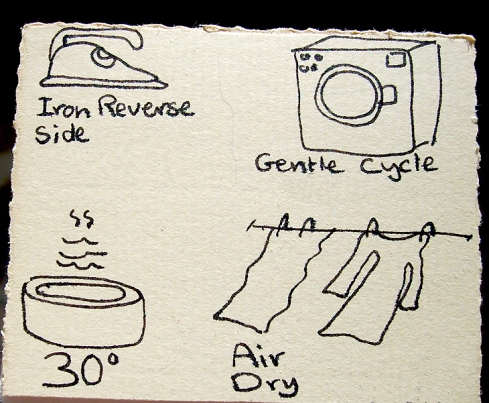
This is the colorless illustration. I basically used cards that are about the size of a regular business card. The paper has a lot of grain and the color is off-white and very nice to work with.

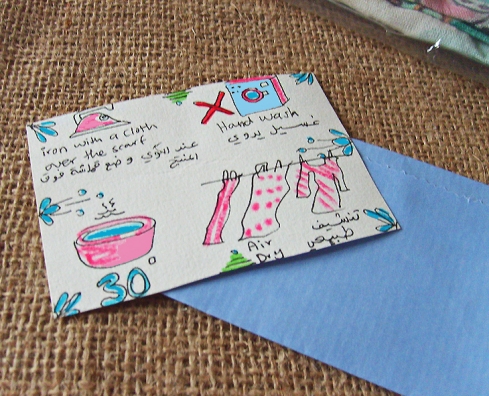
Here’s a label using old markers. I embellished the tag’s borders a bit, but I decided later on that this wasn’t necessary. You can punch a hole at the side of the tag, insert a nice thread or twine, and use a pin or tape to attach it to the product itself, or to the packaging.

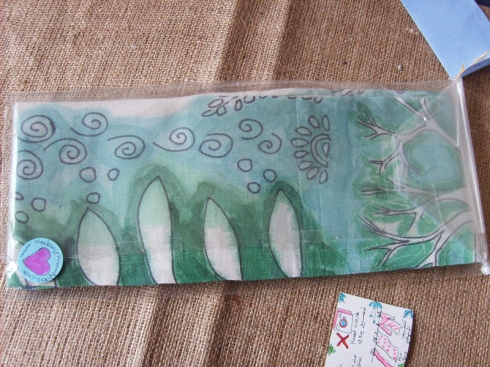
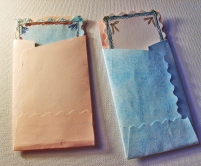
An envelope can also be used if you wanna further spruce up your packaging.

———————

Related Articles

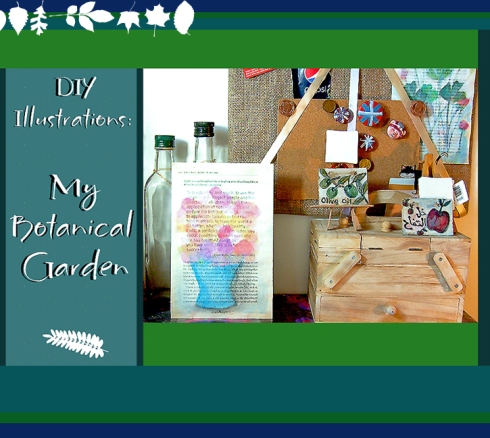
DIY Illustrations: My Botanical Garden | Recycling Old Book Pages

19 Oct

The most soothing after-noon activity is to engage in something new… and botanical. One day, not far ago, I decided it was time for me to experiment with making botanical shapes. This is what happened…

I’m not the watercolor kind of person. All my previous attempts ended up in the trash bin.

But, after spending hours and days… and weeks… collecting botanical illustrations, inspirations, and images over at Pinterest, I started to understand the flow of the botanical shape. What I gathered is that in making watercolor images you didn’t have to be specific – like in doodling shapes with a Sharpie.
On the contrary, watercolor was a very interesting medium where “water” had a big role in the way you applied the color. A brush pregnant with a big dollop of water, and color, and applied with quick watery strokes to create stems and leaves, can actually leave you with an amused smile.

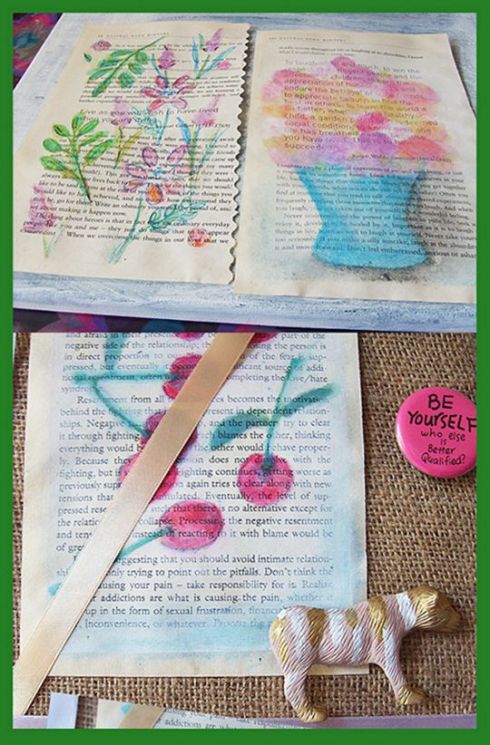
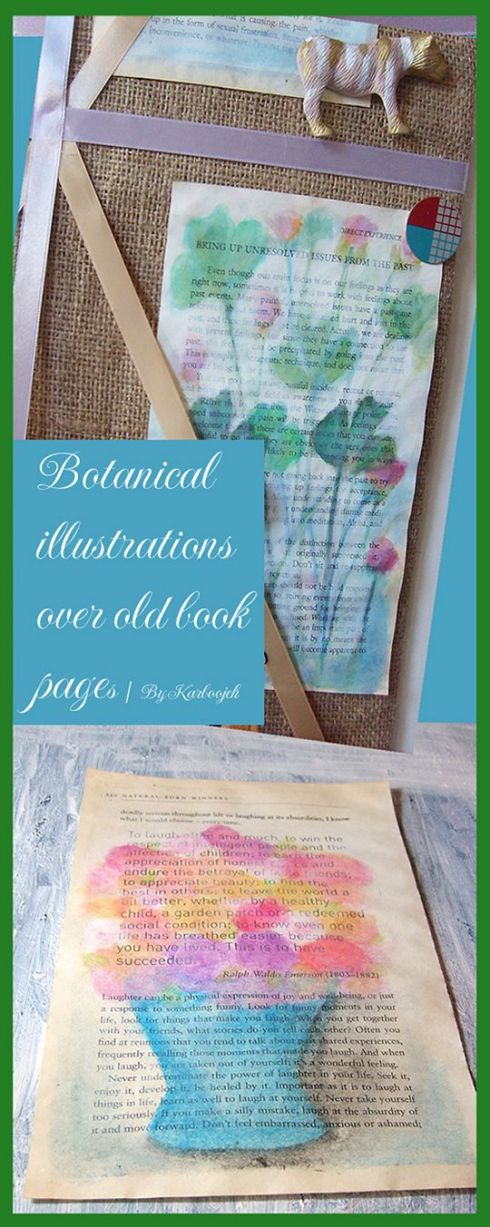
I continued to make botanical shapes – over old book pages and fabric – after I finished these {below} a few months ago.

There is beauty in the  way watercolor bleeds into the paper and settles at the borders it feels comfortable with. Each kind of paper, heavy or light, grained or smooth, has a different communication with watercolor.

The best kind of paper I found I, and my watercolors, were comfortable with, is old book pages. They’re not so old. These are books collected during the nineties whilst I was in the midst of searching for answers. Many are full of gibberish and useless techniques to tame anger, heal hearts, and lose weight. I am an adamant believer that if you find a book useless it is insincere to give it away. Some went to the trash bin, but others stayed with me until the time was ripe for them to become watercolor canvases.

Watercolor has a good understanding with ink. They actually like each other. In some cases, I used bottled ink and applied it after I created the primary watercolor shape. They blend and dance perfectly together. There’s also a bit of acrylic paint in some places, and a dilute-able wooden pencil for sketching quick lines.

————————

Related Articles:


Inspiration: DIY Stamps from Erasers

15 Oct

I love stamps, I use them for embellishing both fabric and paper. Although I’m not so much into geometry and repeated pattern, I still find it very interesting to create a stamp that you can use over and over again for a multitude of projects.

You don’t have to buy fancy stamp-making products to create a durable stamp. There is always the option of the potato to make a quick stamp, just like they taught us at school. But there are numerous materials that we can make stamps from, and they can all be found around us in our everyday lives. Erasers are a good example; you can use cheap erasers to create unique stamps. This you can apply to different surfaces; to spruce up your tablecloths, or embellish your wrapped presents, and even personalize your totes.

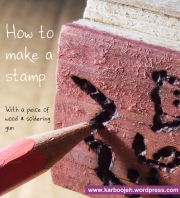
And as usual, here is some inspiration from Pinterest. I tried making my own eraser stamps; they work great… and I do hope I will have the time to share them with you here in the near future.

Tips: Turning Erasers into quick stamps

Here are some tips…

  • Things you usually need: Eraser, craft knife, and pencil to draw your design on the eraser.
  • Stamps can be used on paper, fabric, walls, and any surface you can think of.
  • What really matters is the color you are using, and whether it is ink, acrylic, fabric colors, or fabric inks. And… the surface’s smoothness or lack of; whether it is porous, textured, smooth, shiny, etc. Experimenting with different color mediums and surfaces always gives you a different result, even if you are using the same stamp.
  • It is important to clean the stamps with soapy water once done with them to be able to work with them on different other projects.
  • You need to be a bit delicate with rubber stamps made from erasers, because they tend to tear, especially if the design is intricate.

Source: etsy.com via Karboojeh on Pinterest

  • There are many image-transfer techniques (that I might be posting about soon) to help transfer an image you like unto an eraser. An easy option is, print the image you like in reverse  on regular paper, go over the design with a heavy pencil or piece of charcoal, place the image, face-down, on the eraser, and trace over it with a dull object, so as not to tear the paper.

Source: etsy.com via Karboojeh on Pinterest

  • Usually eraser stamps are good for bold designs, like arrows.
  • As shown in two examples here (see one of them below), pencil rubber ends can be used without carving them as stamps. Just use your imagination.

Source: joybx.com via Karboojeh on Pinterest

  • Stamps are really cool to work with on fabric. Just use a good quality fabric-color range that you can later on fix by ironing. It will become washable and permanent, if you follow the instructions on the can.

I have used stamps to change the look of so many things. You don’t need to create a repeated pattern or a geometrical one, sometimes one stamped shape onto the corner of your tote, or in the middle of your T-Shirt, will be quite enough to breathe in new life to it.

Happy stampin’ :)

———————————–

Related articles

Post image for DIY Eraser Stamps

An Alternative Marketing Approach: The Importance of Intention in Making Our Craft

11 Oct

Intention & Handmade Products

The secret behind a successful handmade jewelry or crafts item, artwork, or design, is a well-perfected intention, and a great amount of curiosity and love. This, I believe, is the reason why some of my work gets sold, and some items stay unsold no matter how I lower the price or re-package the product.

Intention, I believe, is the secret ingredient behind everything in life. Intention, not the one we convince our selves we have, but the actual innermost motivation that makes us nice to people, sociable, active, or none, is what really matters.

I have had around two years to witness and measure the influence of intention on marketing my handmade products and designs.

I will tell you one thing that is a solid truth, discovered during endless hours spent at craft-shows: People buy the items I most love. The products that I made as “replicas” – of pieces I first made with love, curiosity, a sense of adventure, and an open-mind – barely made it into a customer’s handbag!

All my “firsts” got sold, while many unloved replicas, are still stuck with me here in a box, a drawer or a craft-show display unit.

In the middle of noticing how intention affected the way people and customers were attracted to my products, I started realizing all my favorite pieces are getting sold, and I am getting stuck with the “replicas,” the soulless ones, the pieces I made while I was imitating the “mother” piece, the first-born baby, the handmade item I made with great love, and care.

Those first pieces were full of soul because I was shaping them for the very first time, entering the realm of “creativity,” and taking great care in choosing the beads, the colours, the form.

The replicas, however, are pieces that I made with no sense of adventure, with a little bit of boredom looming over my head,  an obvious lack of enthusiasm, and most importantly, were made in a factory-like mode!

What did I do when I realized my favorite pieces are almost gone? I started hiding them; grounding them and not taking them to the first day of the craft show I was participating in. My sales would suffer… so next day I bring some of my favorite pieces and mix them up with other pieces, and lo and behold, they get sold almost instantly!

There is a particular ring I loved so much, but I didn’t think it suited the market I was selling it to. Guess what? It’s gone, although it’s quite eclectic, and the people over here love a uniform, mainstream kind of style. But it got sold, and people started asking for similar eclectic rings; people who didn’t look like they would ever sport a ring that looked absolutely out-of-the norm. And I sold in huge numbers, because each ring was made with a great sense of curiosity, each one was an experiment on its own, no replicas, no boredom, but a heightened sense of curiosity, with a big pinch of love. I have sold all the “good” rings. Each one of them.

Did you know that “factories,” especially those producing accessories and apparel, mobilized machinery for only certain parts of the process, while the rest of the work gets done by people? Which means it’s partly handmade, yet, these products do not carry the glory and the vibe of a handmade item made by an individual, creating his/her products in a factory-less setting.

This means, every-time I entered a factory-like mode, the items I made by hand, did lose part of their soul. They were never attractive to buyers, although, they looked exactly the same as the “mother” item I made, and which got instantly sold.
An Alternative Marketing Approach: Sincerity sells!

Intention, is this covert motive that we hide behind our words, artwork, lifestyle, and even the way we dress. Even when we are vocal about what we think, or want other people to believe, is our intention, still this doesn’t mean that our innermost is necessarily on the same page. An example: A man who acts humble, only his intention is not the true nature of humility, but to impress people and attract flattery.

Another example: An artist who paints with the intention of scoring fame, while using his/her God-given talent for this mere purpose, and not for the higher purpose of actually journeying through the endless realms of art and self-discovery… for art that does not involve self-discovery, and a real search for answers, and a mechanism of change, is probably a form of artistic hypocrisy.

I have fallen into the traps of false intention so many a-times. And have grown to actually hate the very product of my hand that I created with a false intention.

This, people, feel

Customers’ eyes immediately wander towards the “good” items, the loved items… while no matter how hard I try to sell them a truly gorgeous earring, they will not buy the one I’m holding, they will buy the “original” piece or design I created first.

The most important and challenging lesson that I learned ever since I started my crafting journey is how to “perfect” my intention, before actually perfecting the handmade item I was working on.

I started asking myself questions like:

“Why am I working on this?”

“Am I waiting for applause from an audience, or am I working on this out of pure love?”

“Am I motivated? Do I feel like doing this, or am I just ‘finishing’ work like a factory?”

I realized, over the course of time, that handmade work, a painting or a design, are “deeds.” There are “good” deeds, and there are “bad” deeds.

Good deeds come from a place of love.

Bad deeds come from a place polluted with insincerity. When I switch to a factory mode and create pieces just to “finish” the work, I am being insincere. Whereas when I am putting all my attention, enthusiasm, and commitment into my work, I am positively being sincere.

And sincerity sells, exactly because we didn’t have the intention of selling when we made the ring, the painting, the design, or the article.

When we don’t have the intention to impress, to sell, to convince, and concentrate only on the process of creativity, we bring to life a product that stands out, attracts, and can sometimes become legendary.

I have seen many artists who worked so hard at getting famous, wearing certain clothes to accentuate the fact they were artists, wrapping themselves in suffering to deserve the title, artist, yet they never make it past the limited circle of like-minded artists and sufferers. Why? It’s insincerity.

On the other hand, you see artists who become eternal legends. Why? They were busy making art, they had no time cultivating fame. And for that very reason, their work became immortalized.

To work within sincerity, every day, on every item, one needs to cultivate an inner observer that knows when things are getting spoiled by other intentions and thoughts.

I pray that I would reach a level of sincerity in every item I create, and that my deeds, whether as handmade products, paintings or designs, will be “good” deeds, fueled with love, sincerity and commitment.

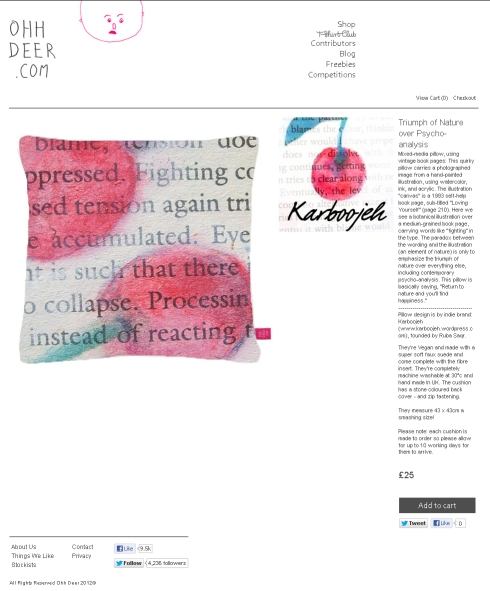
Buy my indie pillows at UK-based Ohh Deer’s online shop

9 Oct

I have great news to share with you today…

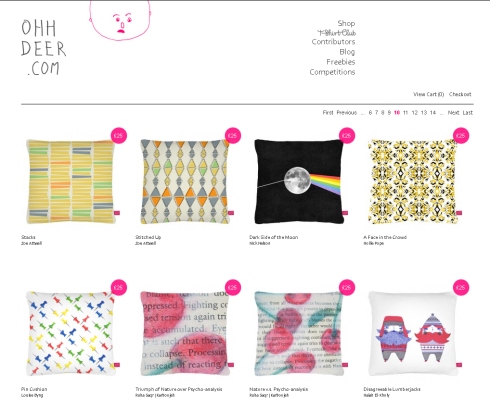
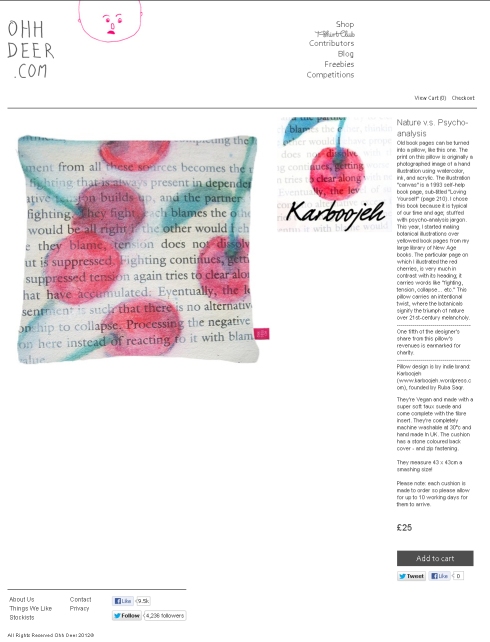
My pillows are being sold at Ohh Deer up until October 29. So grab your Paypals and come shop for some botanical pillow love!

Check these two links to take you directly to the pillows:

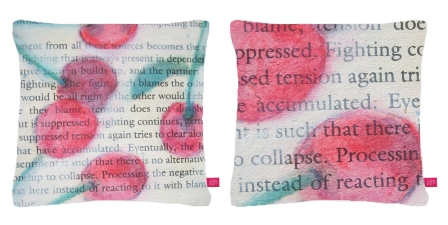
The image on the pillows is originally hand-painted. I used water-colour, acrylic, and ink over old book pages to create the look.

The pillows are Vegan and made with a super soft faux suede and come complete with the fibre insert. They’re completely machine washable at 30°c and hand made In UK. The cushion has a stone coloured back cover – and zip fastening. They measure 43 x 43cm a smashing size! They cost £25 each.

This is my first online sale ever. I have been active in craft shows, but kept on postponing taking the online plunge. So, I’m really excited about this! The pillows are a limited edition and are being sold for a limited time: 3 weeks starting yesterday. So, don’t miss out on this special sale!

Happy shopping, all :)

—————————-

Related articles:

In Love with the Colour Green

8 Oct

Green, and the different shades of this beautiful colour, are my newest love.

Green is the symbol of rejuvenation, vitality, and freshness. It’s the colour of nature, happiness, healing, new beginnings, goodness, generosity, and good tidings. I think it is the original colour of love, romance, beauty. Most beautiful scenery is beautiful because it enjoys an abundance of greenery.

Green is the colour of plenty, prosperity, wealth (in the physical sense and the spiritual one). And of course, it is the colour of herbs that we so love, and many vegetables, and leaves. And it is said to repel envious energy emanating from jealous people, although blue seems to be the official colour.

Green invites cheerfulness, lifts one’s morale, defeats depression, and changes one’s mood. That’s why people with depression or anxiety are advised to keep in close proximity to nature, so that eventually the colour green with all it’s hidden attributes will heal their souls, minds, and beings.

Green is the colour of inspiration, creativity, and artistic ability. Throughout history, artists, writers, painters, and millions of creative people found their muses while being in the arms of nature.

Here are some of my favorite photos from Pinterest, celebrating the colour Green.

Green & Gold…
Artichoke Green…

Source: etsy.com via Karboojeh on Pinterest

Botanical plate…

Source: williams-sonoma.com via Karboojeh on Pinterest

Garden accessories…
Grass-like carpet…
Vintage Green…
Source: etsy.com via Karboojeh on Pinterest
Botanical-print pillow…
Green bottles…

Take care :)

2 Oct
The Frugal Crafter Blog

Groovy craft projects, crafty recipes and other artsy stuff.

Illustrated Bites

an illustrated food blog

Dream Green DIY

An indie handmade jewelry & crafts creation house

from Hell to Breakfast

bustin' a 5-year-old crafts hoard, one bloody button at a time

W E S E E R A I N B O W S

//dream in color//

Stuff I’ve been drawing

Illustration and graphic design - don’t be shy and say hi at mercedesleon@merchesico.com

EASYBAKED

a collection of recipes

What Katie Made

The best DIY projects. Your wallet will thank me later.

The Importance of Being Quirky

May Your Days be Filled with Love, Good Health, Smiles, and Umbrella Drinks!

thehighnotedotnet

vintage music and the high notes of life

Life.Style.etc

Chic, unique and inspired ideas... as spotted by the team at Livingetc

My So Called Crafty Life

The life and times of a craft addict

The Window Display Blog

Images and words on the best displays around London

If We Took A Holiday

108 days around the world

Niki Fulton

looking at colour and form

The Unexpected Chic - Interior Design, Decorating, Inspiration for home

Fresh interior design, decorating ideas and inspiration for your home

Custom Art and Design

Neurotic. A Jane-of-all-trades. Genetically diverse. Interior designer. Artist. Upcycler. Volunteer. Dreamer...♥

hovercraftdoggy

A curated glimpse into a world of infinite beauty and creativity.

Parcel Post

An indie handmade jewelry & crafts creation house

button, button ...

I embroider and knit. A lot.

paper, plate, and plane

A world of crafting, entertaining, and travels.

A Pocketful of Notes

Sharing ideas and thoughts...one note at a time.

Jackie's blog

Sharing with you a little stampin' and scrappin'

Re-Creations Project

Upcycling and Craft for All Abilities

buubok

Modern Knits for Interior

Tiny Octopus Designs

Selling Cephalopods

stashburning

what I make, thrifting and more

Thrift Shopping Buzz

Stay stylish & fabulous without spending a fortune. One store at a time.

Sweet Pea's Kitchen

A food blog with healthy simple and tasty recipes.

twistedsisters

Sisterhood of the creative force!

Butterscotch Tabby

A journal where I contemplate, outloud, what I may "make" rather than "buy" that remains useful, yet attractive little pieces of art. A review blog that combined with a little frugality can greatly enrich your lifestyle. Check out my store for a source of low cost creative supplies: www.butterscotchtabby.com